Microsoft SQL Server 2019 được xây dựng trên khái niệm để đưa trí tuệ nhân tạo tiến thêm một bước với việc cải tiến dịch vụ cơ sở dữ liệu, bảo mật, tích hợp vào các cụm dữ liệu lớn, v.v.
SQL Server Express là phiên bản miễn phí, phù hợp với các ứng dụng cỡ nhỏ (cơ sở dữ liệu dưới 10Gb). SQL Server Developer là phiên bản đầy đủ nhưng chỉ được sử dụng trong quá trình phát triển ứng dụng.
SQL Server Management Studio (SSMS) là phần mềm hỗ trợ quản trị SQL Server. Bình thường SQL Server chỉ có phần engine và các service, không có giao diện đồ họa để phục vụ quản trị. Các thao tác quản trị phải thực hiện qua giao diện dòng lệnh console. Để đơn giản hóa các công việc quản trị cơ bản, chúng ta sẽ cài đặt thêm phần mềm SSMS 2019.
Tính năng quan trọng
Yêu cầu hệ thống cài đặt
Để đảm bảo thiết bị phần cứng chạy ổn định SQL Server và các ứng dụng khác:
Tối thiểu RAM 4GB - CPU Core i3-i7 - Đĩa cứng 50GB trở lên
Tốt nhất Ram 8GB Đĩa cứng SSD 128GB ĐĨA C -Corei 3-7 thế hệ 6 trở lên
Download Microsoft SQL Server 2019
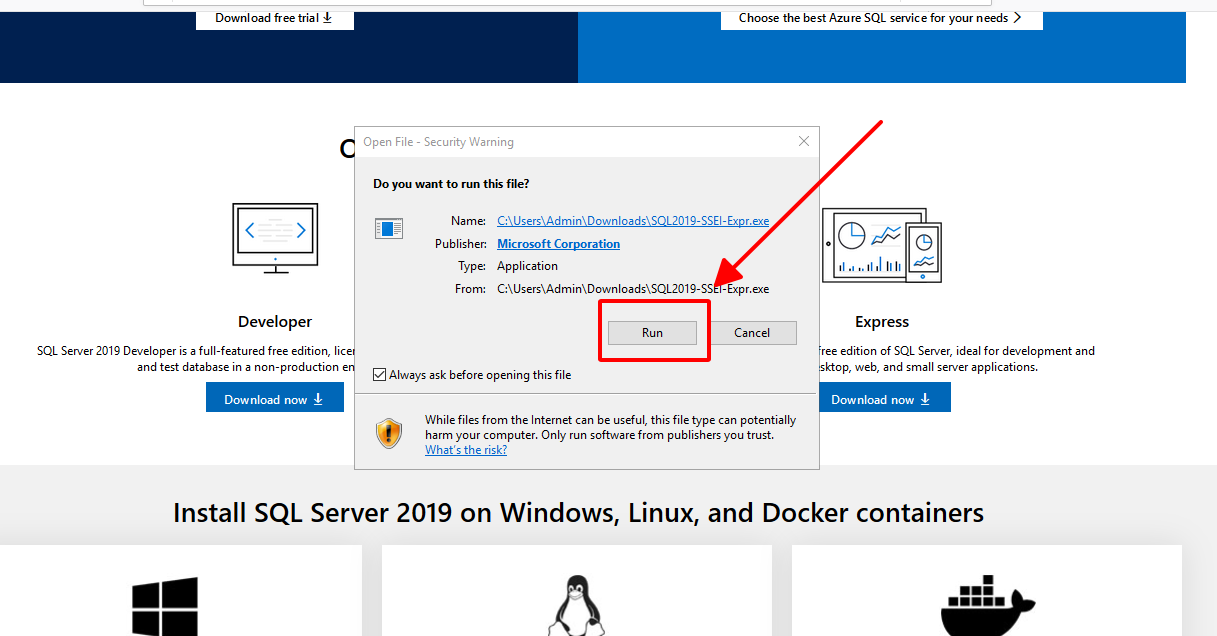
Khi nhập địa chỉ liên kết này trong trình duyệt Internet Explorer trên máy ảo, bạn sẽ có lựa chọn dùng thử bản SQL Server 2019 hoặc kéo xuống dưới một chút để tải bản miễn phí (Express hoặc Developer).
Chọn một phiên bản để tải xuống, nếu chọn Express bạn sẽ tải xuống file có tên SQL2019-SSEI-Expr.exe. Hãy lưu nó vào máy ảo và chạy file này. Sau đó, chọn một trong các kiểu cài đặt sau:
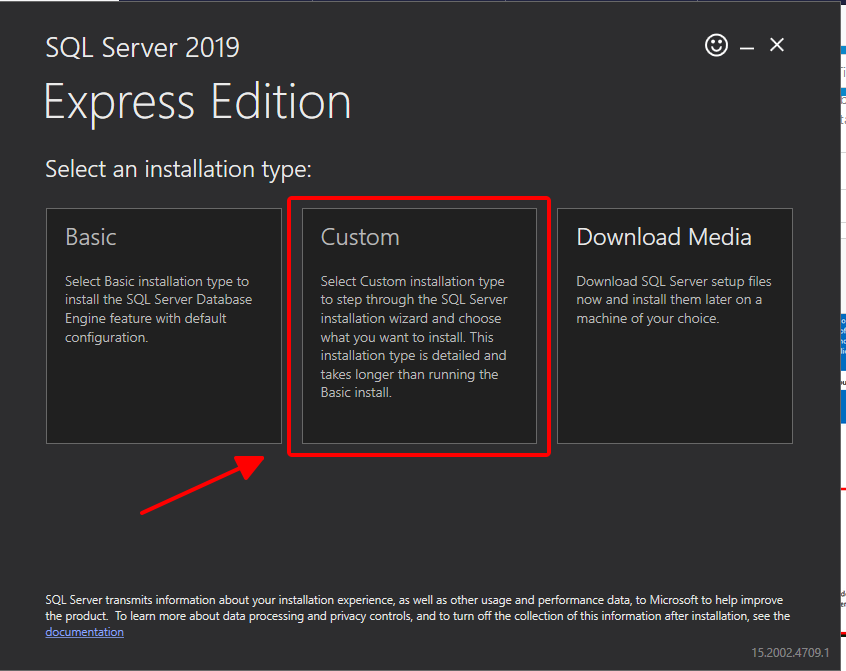
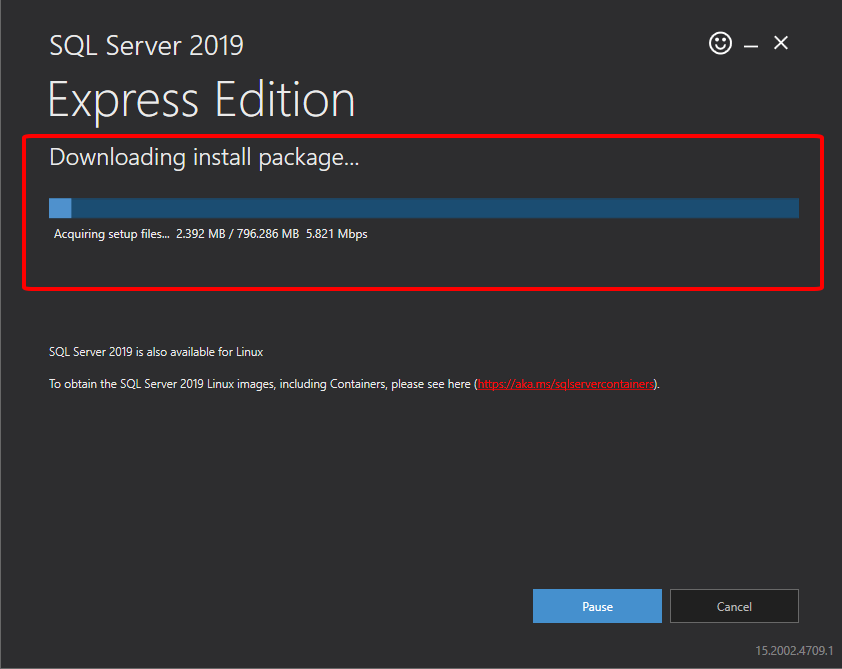
Như bạn có thể thấy, có ba loại cài đặt khác nhau mà bạn có thể sử dụng: Basic, Custom và Download Media. Ví dụ trong bài viết này sẽ chọn tùy chọn "Download Media". Khi quá trình tải xuống bắt đầu, trang sau được hiển thị:
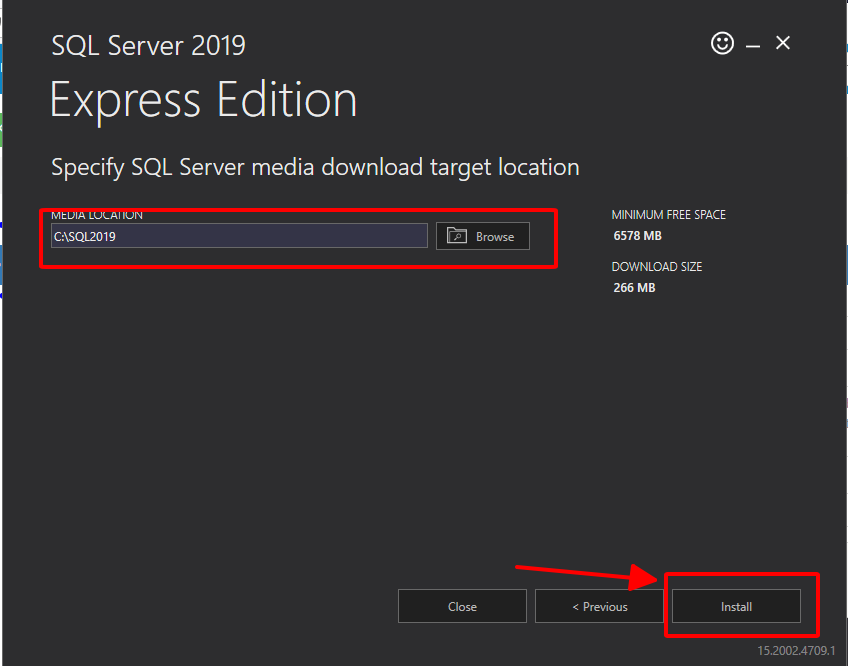
Trên màn hình này, bạn có thể chọn ngôn ngữ của mình, loại gói muốn tải xuống (ISO hoặc CAB) và vị trí lưu trữ image cài đặt. Chỉ cần chọn các giá trị mặc định và nhấp vào nút “Download”. Điều này bắt đầu quá trình tải xuống và hiển thị màn hình tiến trình tải xuống như sau:
Khi quá trình tải xuống hoàn tất, bạn sẽ nhận được màn hình thông báo việc tải xuống thành công như sau:
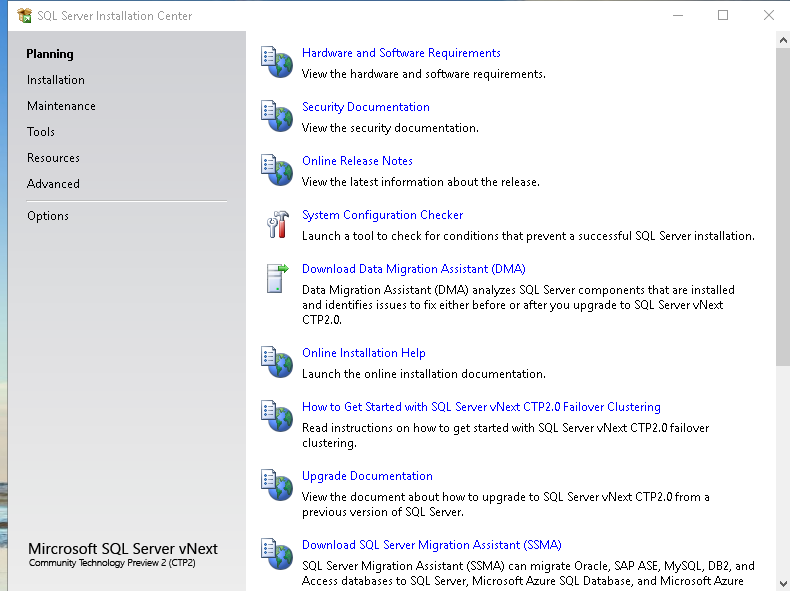
It launches the SQL Server installer page that contains links for below pages:
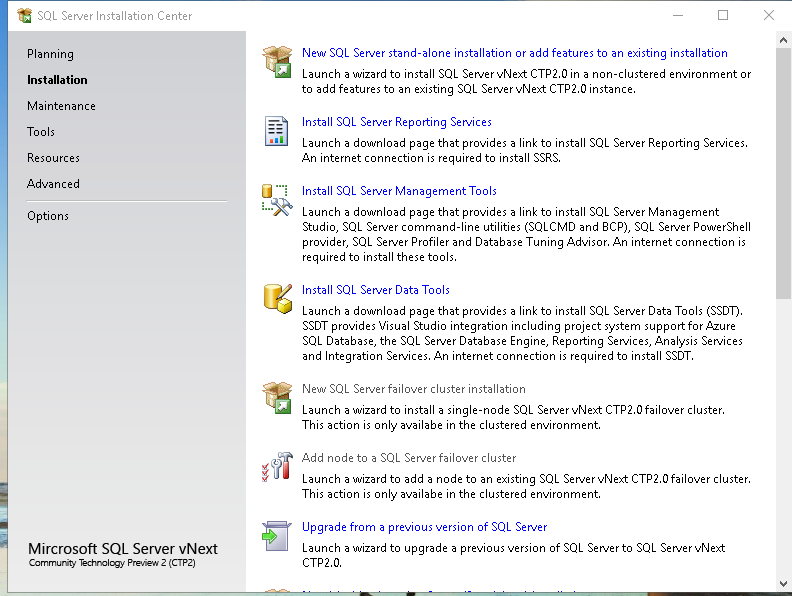
Click on Installation page and then on ‘New SQL Server stand-alone installation or add features to an existing installation’
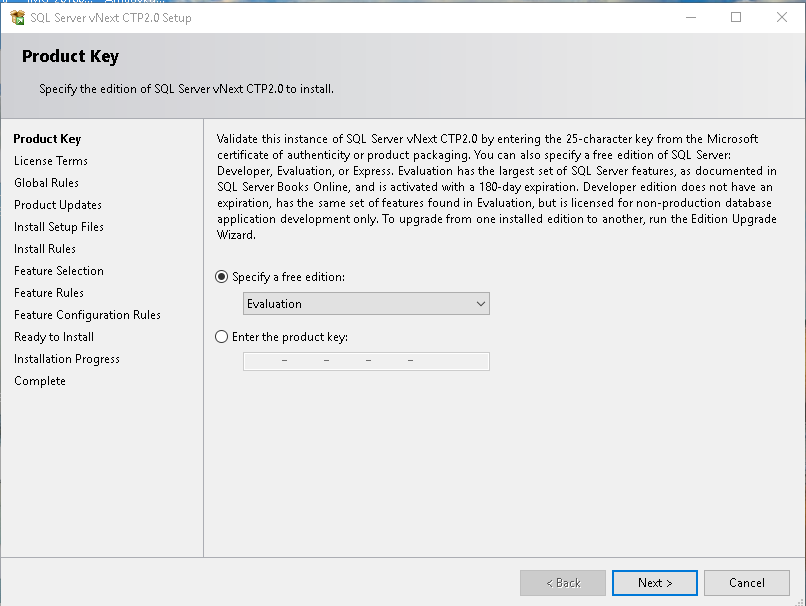
Since we are installation evaluation edition of SQL Server vNext CTP2.0, we will move will default option ‘Evaluation’ and click Next
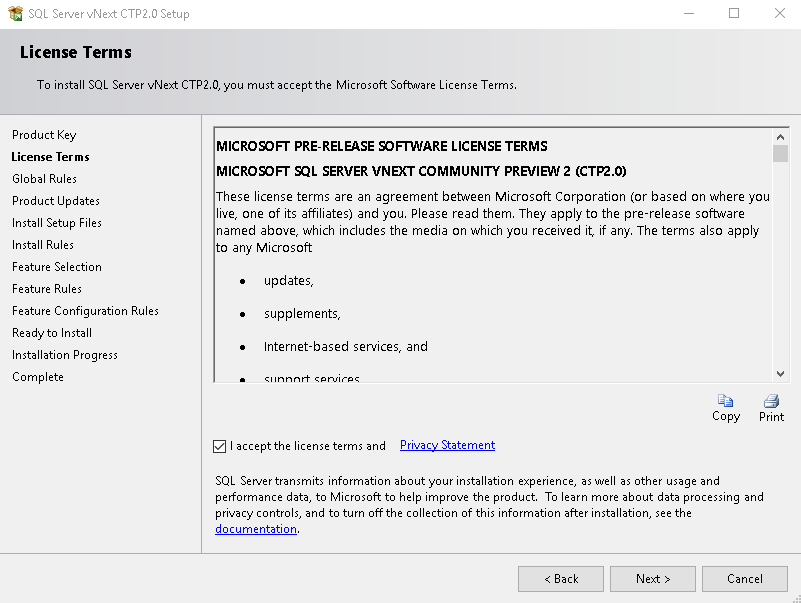
Accept the license terms and conditions. Please note the message written here that SQL Server
Transmits information about installation experience in performance data to Microsoft to help improve the product.
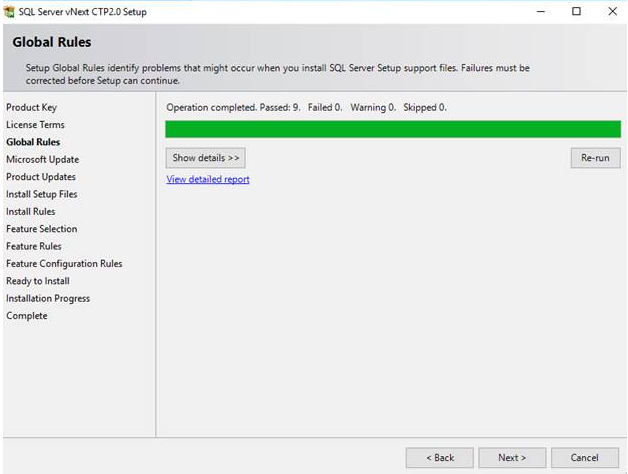
Click on Next. In the next page, it checks for the Global rules and give status information about successful, failed rules. If there are any failed rules, we need to fix those before proceeding with the installation.
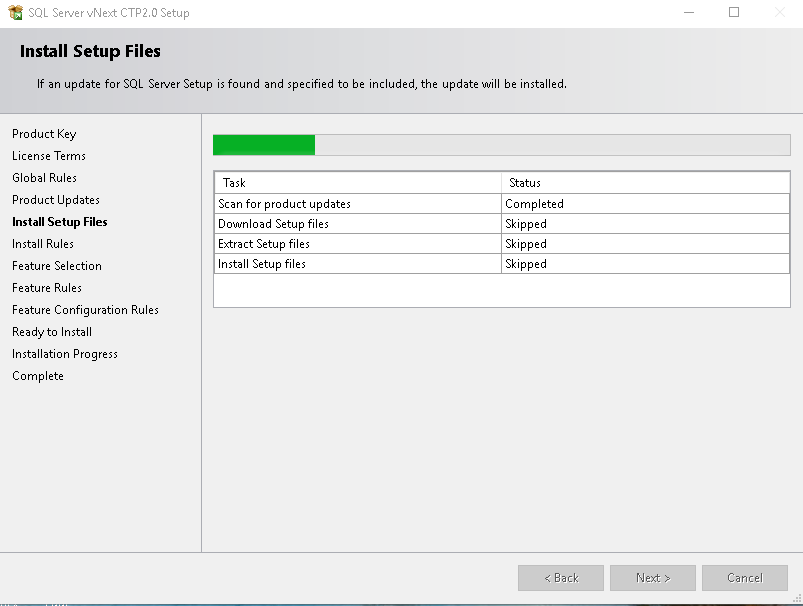
In the next step, it downloads the setup files. If SQL Server installation is already there on the server, it might skip the steps.
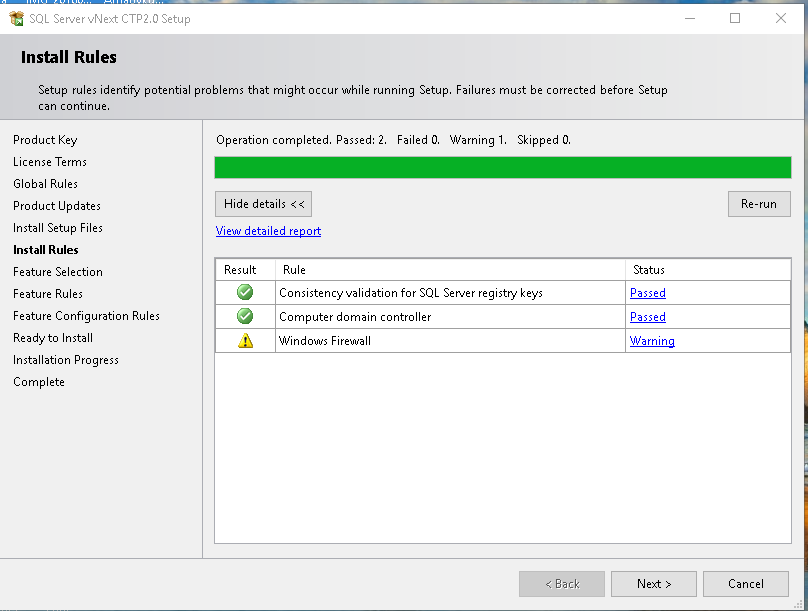
In the next screen, it checks for setting up rules that might cause issues in the SQL Server installation. We can see the warning message against the Windows Firewall but it can be ignored. Click next to move further.
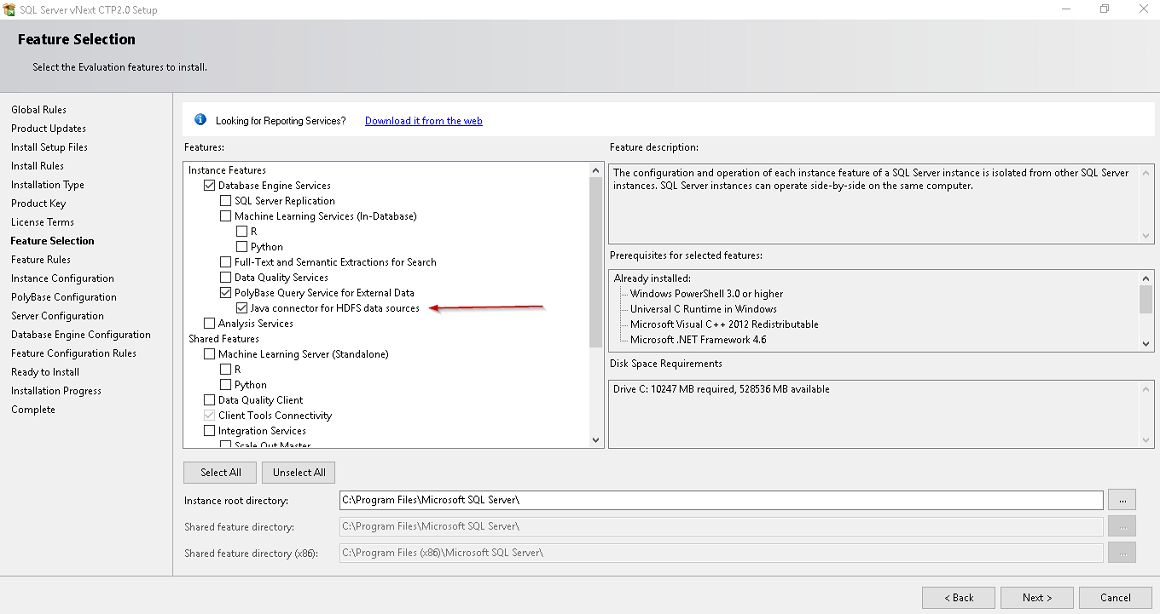
Now we need to select the features, we need to install with this installation. We can a new option ‘Java connector for HDFS data sources’ as compared with SQL Server 2017 installation.
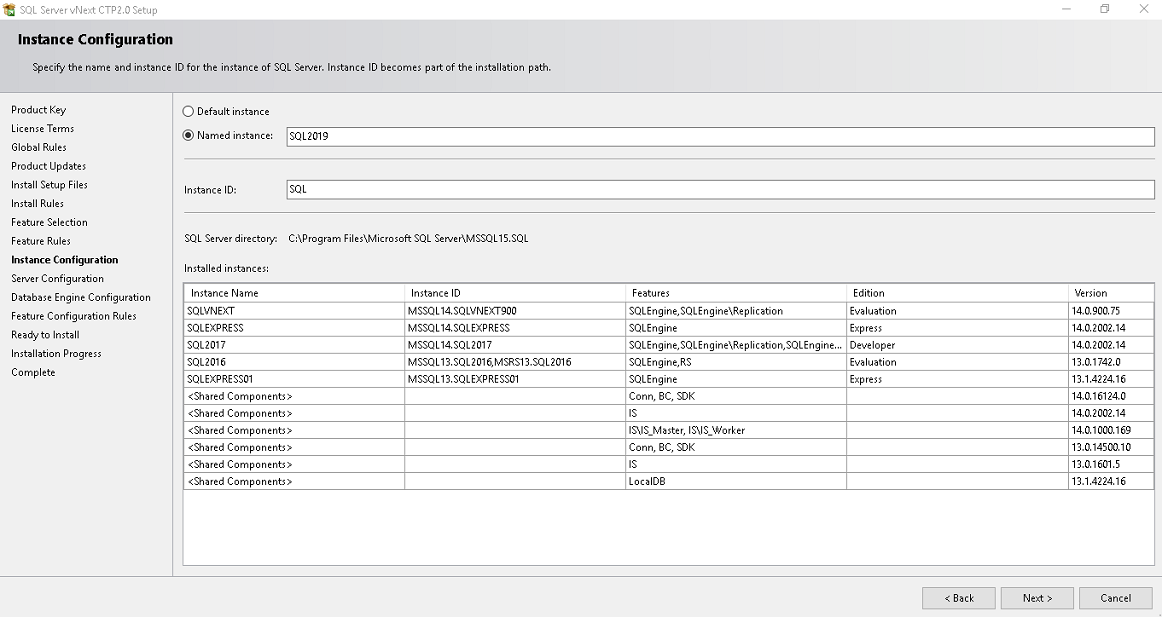
You can choose to install a default or named instance name. If a default instance is already present on the machine, we can only install named instance. Provide an appropriate name for the named instance. For example, I specified SQL 2019.
In the next page, Server configuration, you can specify service account to use for SQL Server services along with the Collation. In this article, let us move with default service account and collation. We can change service accounts later from SQL Server configuration manager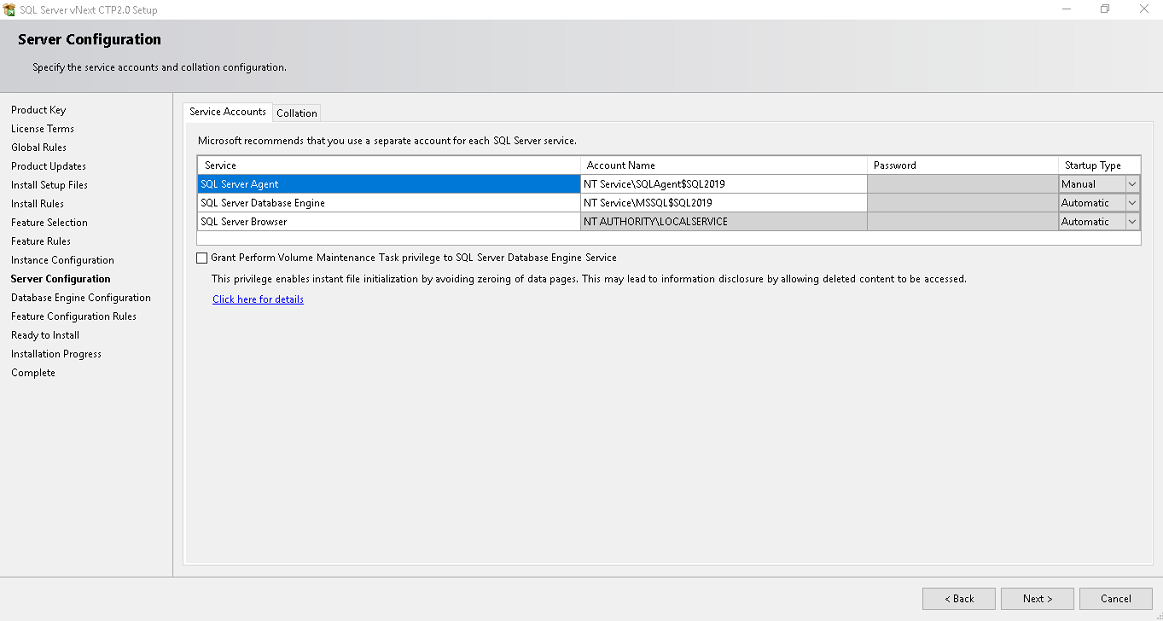
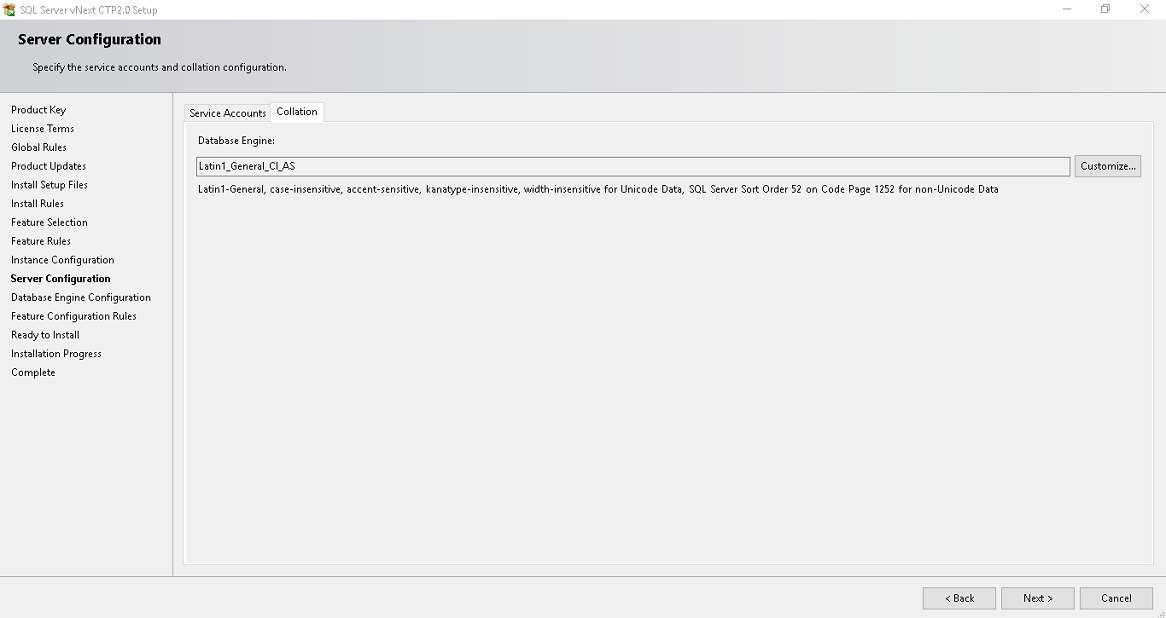
If we want to change the collation, click on customize and choose the required collation. We need to be cautious while changing Collation.
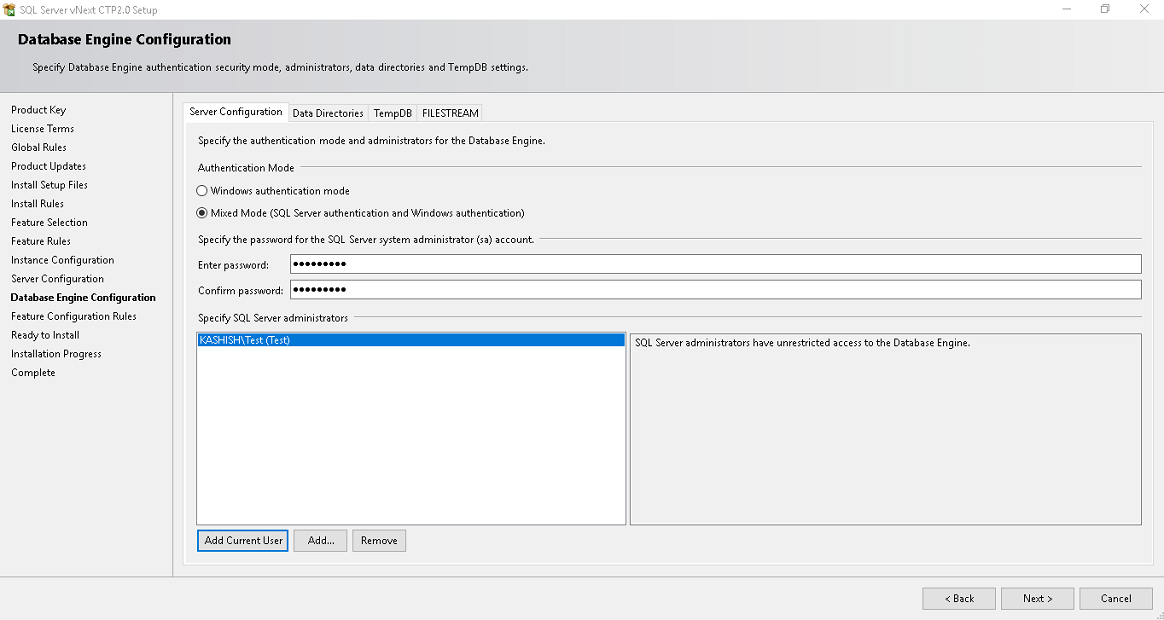
Specify Authentication modes (Windows or Mixed mode) and add users to have SQL Server administrators.
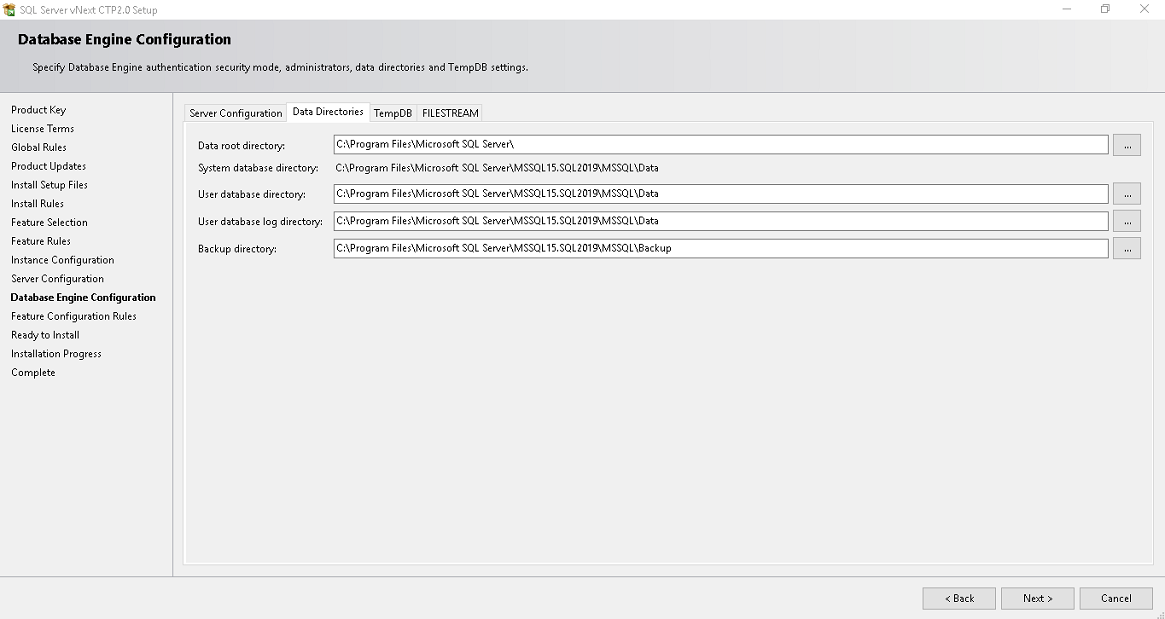
Click on Data Directories and we can specify the data, log files, backup directories here.
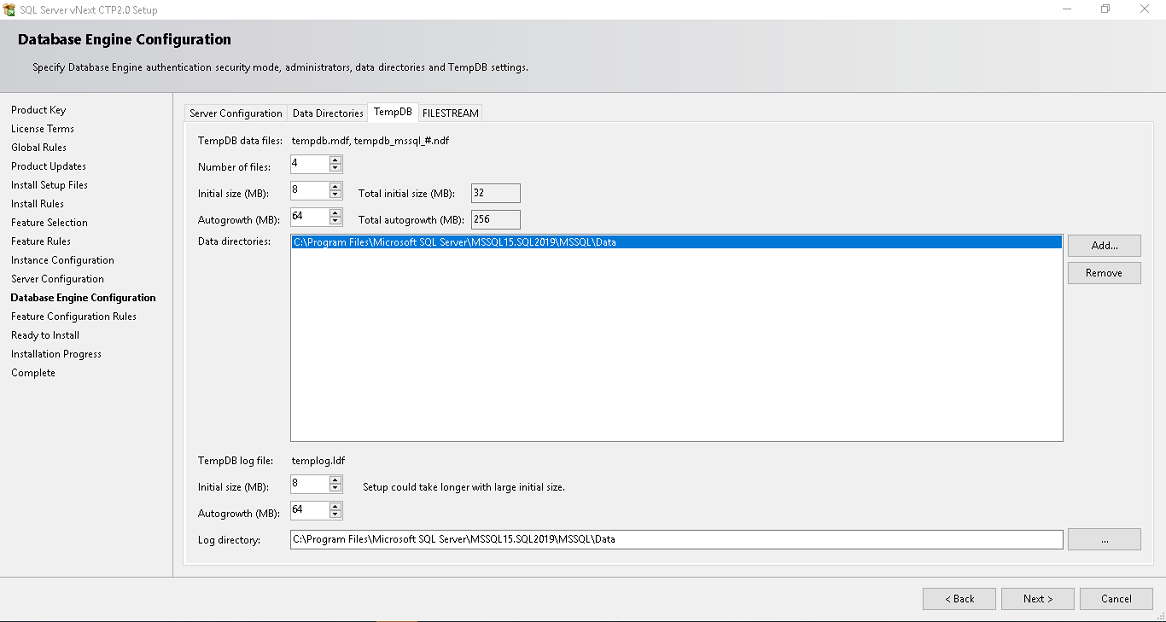
Click on TempDB to configure the TempDB configurations. We will move with the default configuration suggested by the installer.
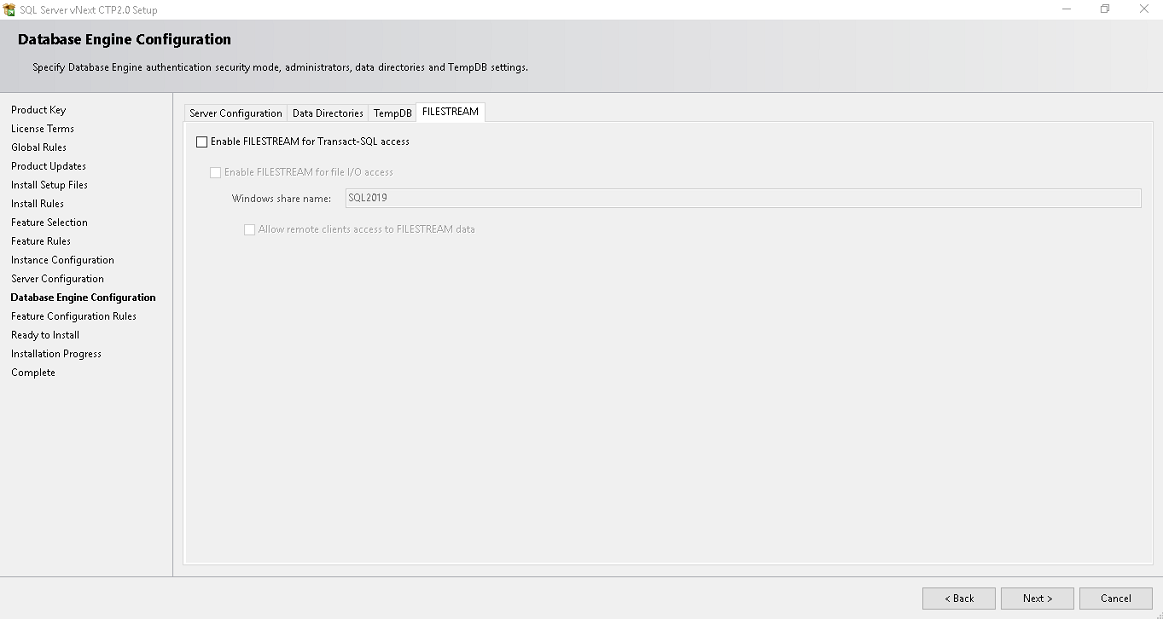
If we want to enable Filestream, enable this option else to leave and click on Next.
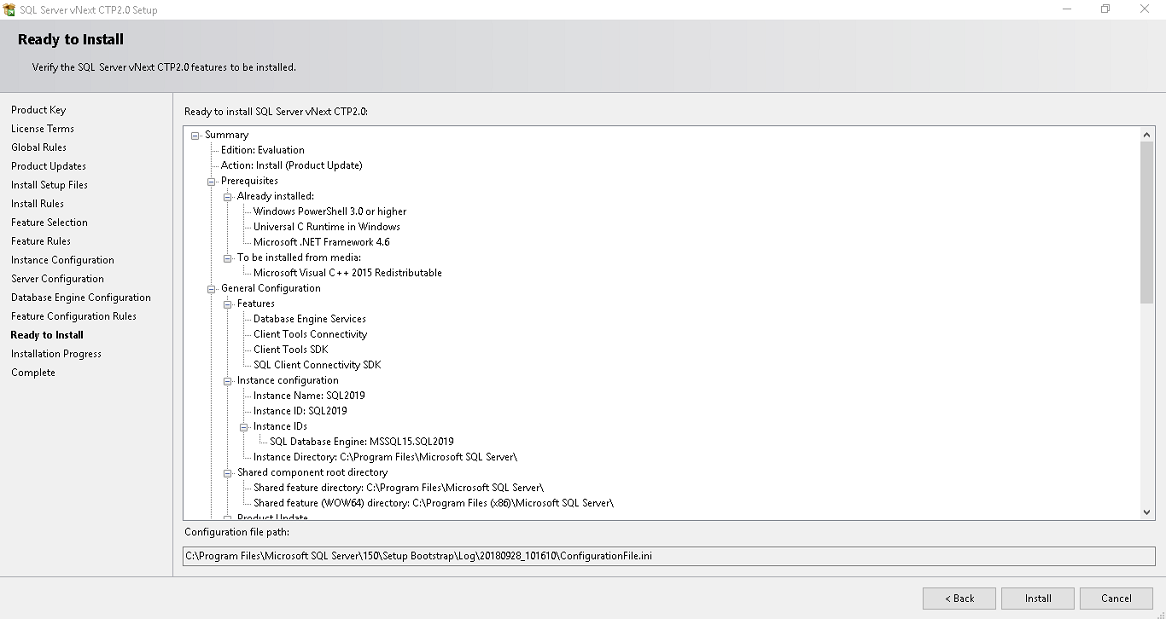
We get an overview of the SQL Server configurations from the Ready to install page. Review the information and click on next to start the installation process.
Once the installation is completed, launch SSMS 18.0 preview to connect with SQL Server.
Free Down Ads – Tải về